How to Get Video from SD Card?
There are two ways to get the video from the SD card in a system. This does not include if you have an alternative way to collect the recordings such as Milestone VMS.
Axis Companion
1. Launch Axis Companion and sign in using the credentials that were provided upon purchase. See here for more instructions
2. Go to the recordings tab on the top left
In the Recordings tab there are many useful investigation tools to speed up your investigation.
Recordings Tab
1. By clicking on the cameras on the bottom it will choose that camera to get all the recordings from it
2. The blue line is the timeline of the recordings. This blue line shows if there is recordings for that time. If the line is red that means it recorded because of motion
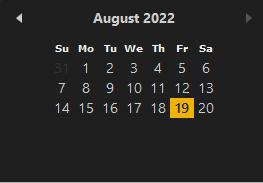
3. By clicking on either arrows next to the date it will change the date by one day accordingly. If the date it clicked it will pop open a date selection box. Clicking a date will change the date of the recording being shown to the date chosen
4. There is a yellow pin in the blue time line. Wherever this pin is relates to what recording is currently being played. This pin can be dragged to certain times
5. By selecting the error on the right hand side of the recording options it will show all the cameras timelines. Selecting a camera on the timeline will switch the view to that camera. To close the multi camera timeline view simply click the arrow on the right hand side again
6. On the far right hand side of the recording options there is a save button. When pressed it starts the saving process of recordings from the SD card to a computer.
Saving Recordings
1. Make sure you have the camera you want to get the recordings from selected by following Step 1
2. Select the desired date the recordings will be from
3. Drag the two endpoints (White Pins) to the desired start and end points accordingly
4. Save the video by click on the yellow Save button
The recording will now be saved to the computer.
Web Interface
Getting to Recordings
1. Sign into the web interface for the Axis Camera. Go here to learn more
2. Pull up the Settings tab by clicking the Settings button in the bottom right corner
3. Go to the System tab by clicking on the System tab
4. Click on Storage on the bottom row
5. Click on Go to recordings...
Filtering Recordings
Here are a few helpful options the recordings tab gives you:
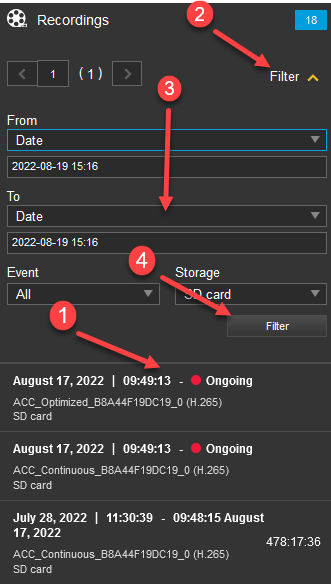
1. All the recordings the SD card has. As can be seen this system has continuous record on, making the video 478 hours long! Trying to export this much data will take hours. In order to narrow down the time frame change the Date filter to the desired amount and then export the video
2. By clicking on the Filter button on the top right it will open up a lot of filters that can be used to filter down search results
3. There are many different filtering options to further filter down your video. The most common one is the Date option. By setting the From date to where the video should start and the To date to when video should end then the video in between that time will be downloaded onto the local computer
4. Make sure to select the Filter button to actually filter the results
Exporting Video
1. Select the desired video clip
2. Select Export from the gear icon in the bottom right
3. Export the video by pressing the blue Export button on the pop-up


